
By TechnologyAzure and AWS Monitoring
By IndustryIntegrates with your stack
By InitiativeEngineering & DevOps Teams
TechnicalIt’s easy to get the help you need

The Azure Portal is the go-to place to manage your Azure resources. I spend a lot of time in the portal. I’m sure a lot of you do the same. Here are some tips that will hopefully help you to make the most out of your time in the Azure portal.
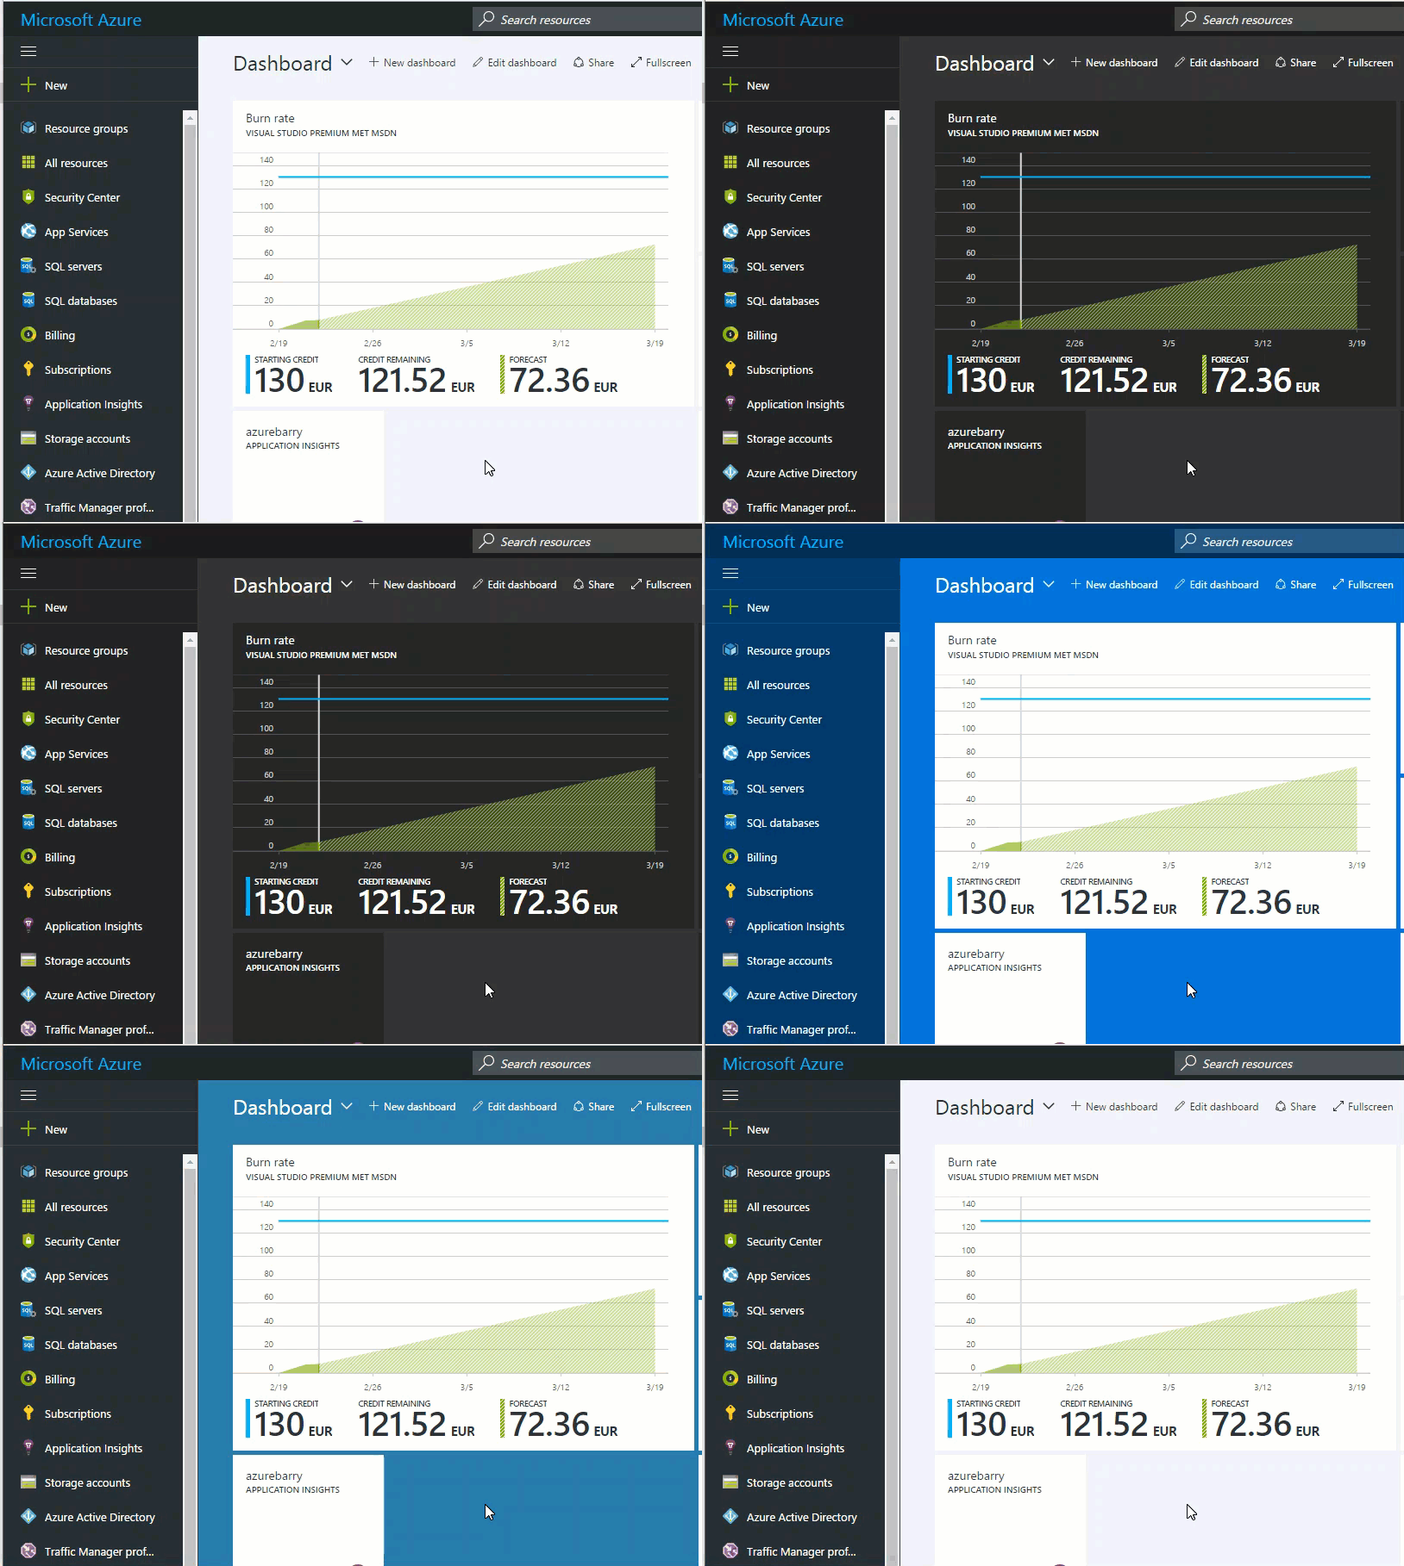
Double-click on any open space on the dashboard in the portal to change the theme.
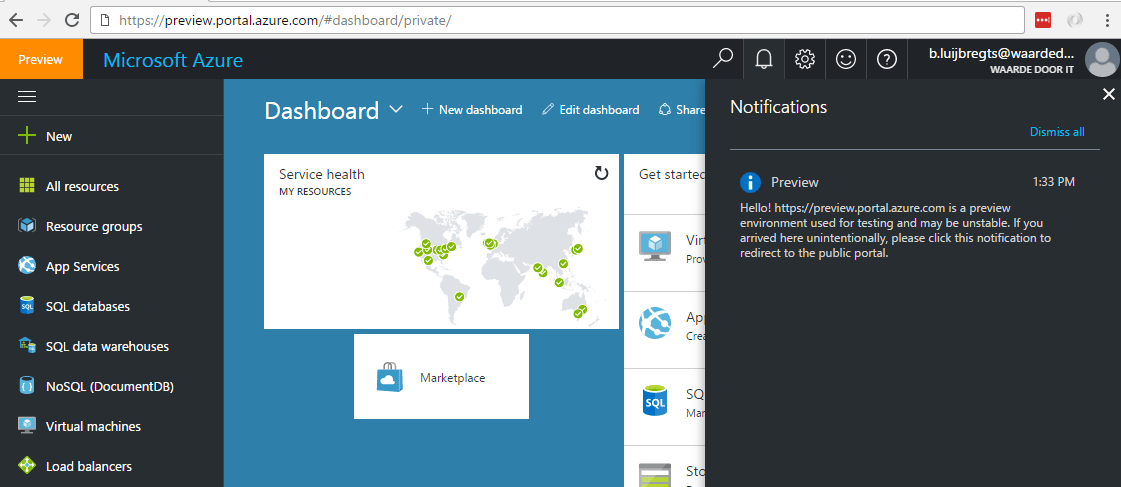
A preview of what!!??! Are they changing the Azure portal again? No, not really. Microsoft is just continually improving the current Azure portal. You can access a preview of what Microsoft is building at https://preview.portal.azure.com/. This version of the portal changes often. Use it at your own risk, as some features might be unstable (it is a preview version, after all).
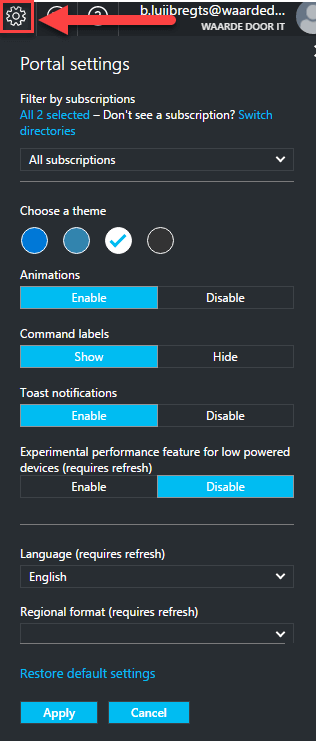
Besides themes, there are more things that you can change in the portal. Click the gear icon on the top of the portal to open the settings blade.
Here you can change settings, and you can change them per subscription if you want.
There are some interesting settings that sometimes make the portal faster. Disable animations and enable experimental performance features will speed up the portal in most situations.
Also, you can change the language and regional format (how dates, numbers, etc. are displayed). Usually, these are automatically set correctly, but I’ve had a couple of instances where I needed to set these manually.
The dashboard on the main page of the portal is fully customizable. You can change and add items on it to completely make it your own. You probably knew that already. But did you know that you could create more dashboards?

You can create more dashboards with the Add dashboard button. By default, dashboards that you create are private and only you can see them. You can also share your dashboard so that others can see it. You can control who has access to your shared dashboard by assigning users, groups, and roles that have access.
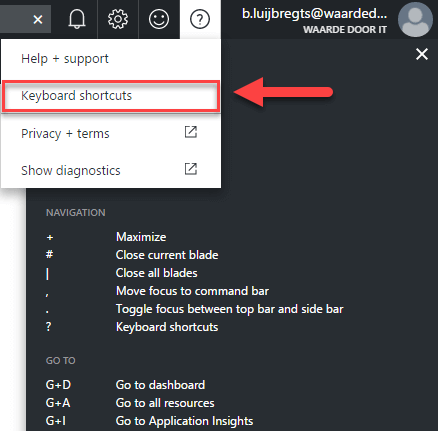
I love not needing a mouse! There are some great keyboard shortcuts specifically for the portal. Open the Keyboard shortcut help item in the Help Menu on the top-right of the portal to see all of the shortcuts.
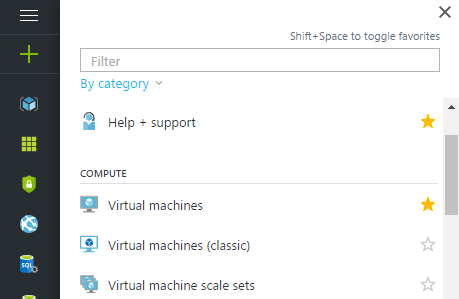
On the left of the portal is the favorites menu. These are icons of resource categories (like App Services) that provide quick access. You can rearrange the icons by dragging them up and down. You can also select which ones you want to see when you expand the favorites menu and click on the stars of the categories.
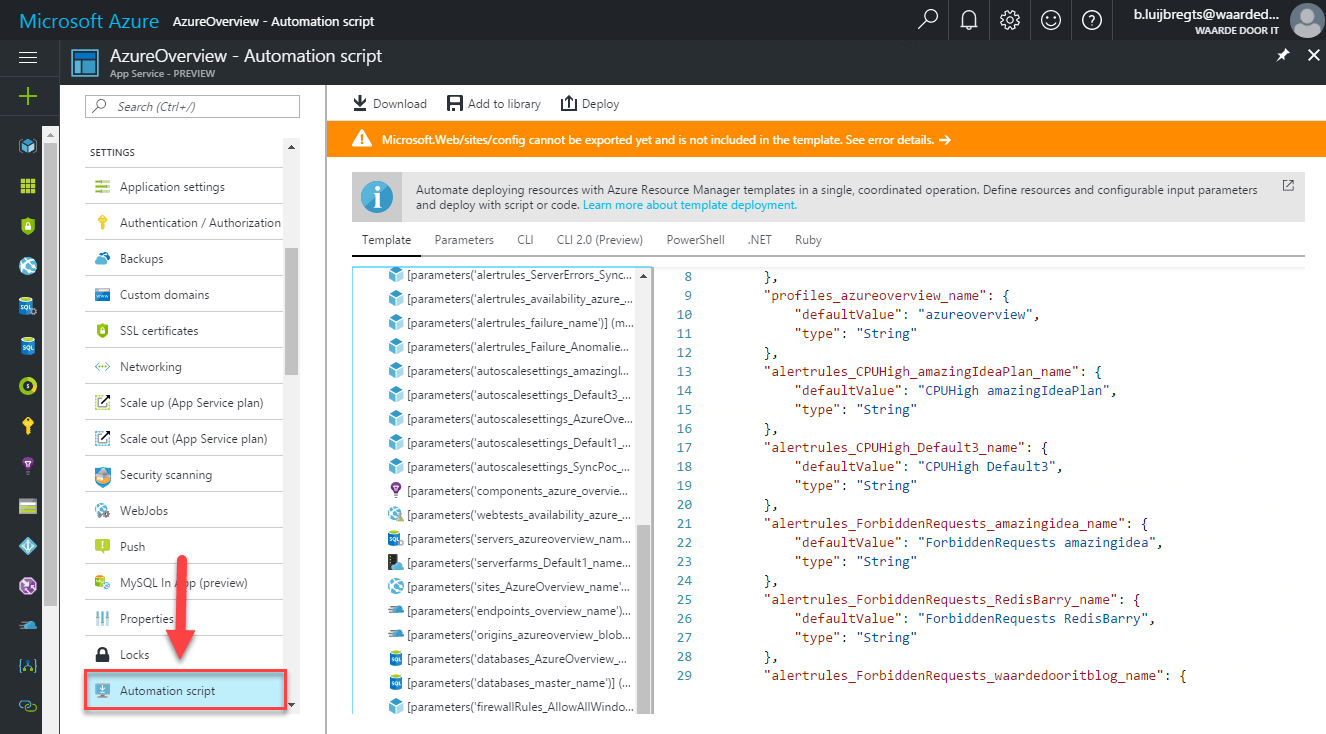
Whilst in the portal, in (almost) every resource, like a Web App, an Azure SQL Database or a Resource Group, you have the option to generate an automation script. You can generate an Azure Resource Manager (ARM) Template, a Command Line Interface (CLI) script, a PowerShell script, C# code or a Ruby script that would deploy that particular resource through ARM. This option is very powerful if you want to automate the deployment of your resources. It can generate scripts for most resources with some exceptions (i.e. not for an Azure App Service Certificate and some other resources).
In the portal, you sometimes see the word preview next to a service. I’ve seen that many times where I was sure that the service was generally available. Here’s an example:

In the portal, the word preview just means that the Azure portal experience is in preview. It doesn’t say anything about the service, even if the service actually is in preview. For instance, the Azure Service Bus experience in https://portal.azure.com/ is in preview, because it is still being ported over from the old portal.
If you want to know if a service is in preview or generally available, check out https://azure-overview.com/.
We’ve seen that you can generate templates from resources, but did you know that you can see deployments of resources to a resource group?
When you are in a resource group in the Azure portal, you can see the deployments menu item. You can also get to the deployments from the deployments item in the essentials blade (on the right of the image).
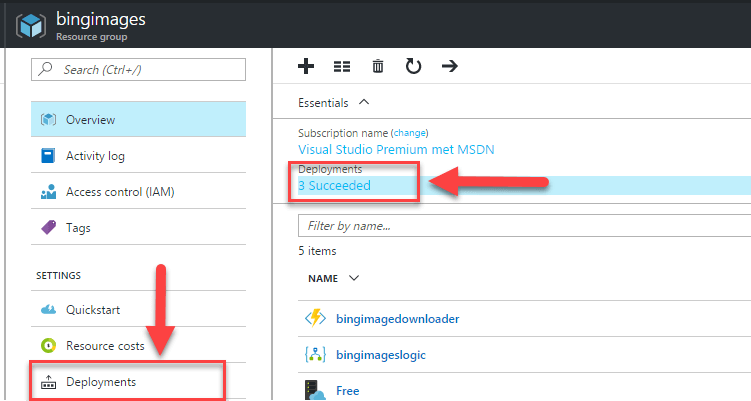
When you click it, you can see all of the deployment that happened to this resource group and if they succeeded or failed. You can also see deployments that are in progress if there are any.
You can drill into a particular deployment to see details, like how long it took, and which steps were included in the deployment. From here, you can also generate the deployment script and even re-deploy this particular deployment.
Stackify's APM tools are used by thousands of .NET, Java, PHP, Node.js, Python, & Ruby developers all over the world.
Explore Retrace's product features to learn more.
If you would like to be a guest contributor to the Stackify blog please reach out to stackify@stackify.com